How to set up an email account on an Android device?
To add an email account on your Android device, select “Settings > Accounts”:

Then select “+ Add account”:

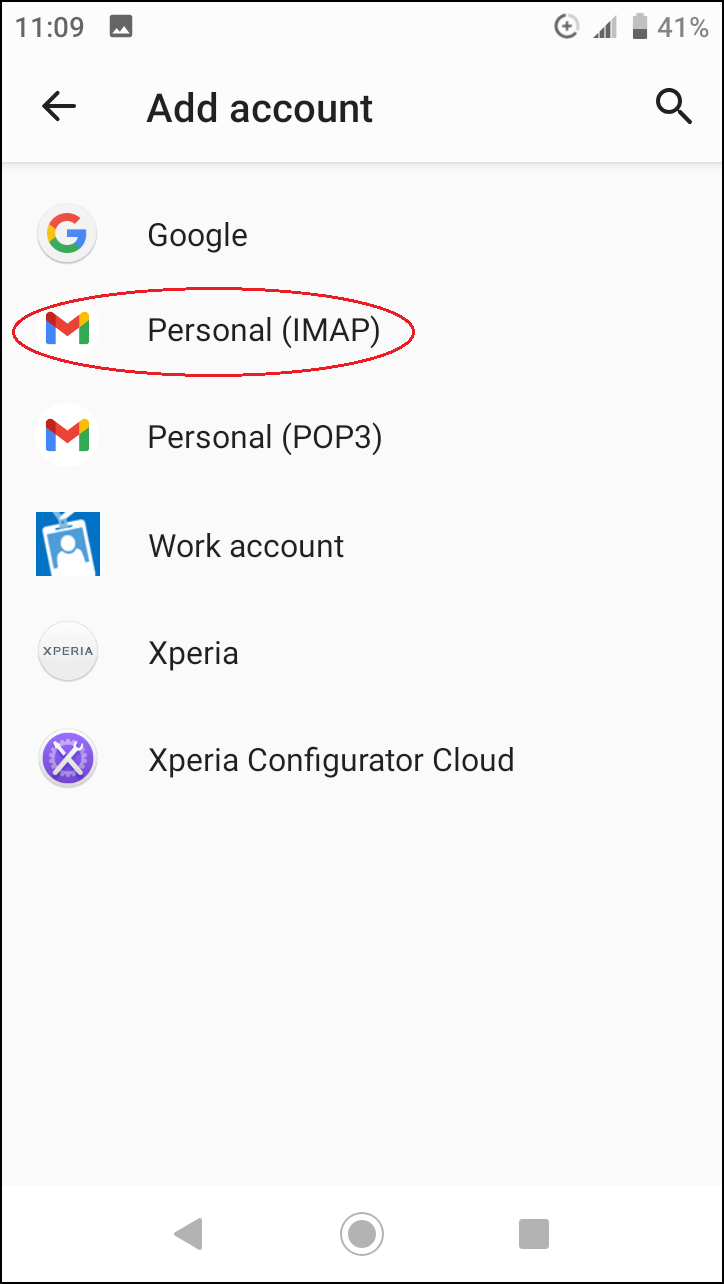
On the Add account settings page, select “Personal (IMAP)”:
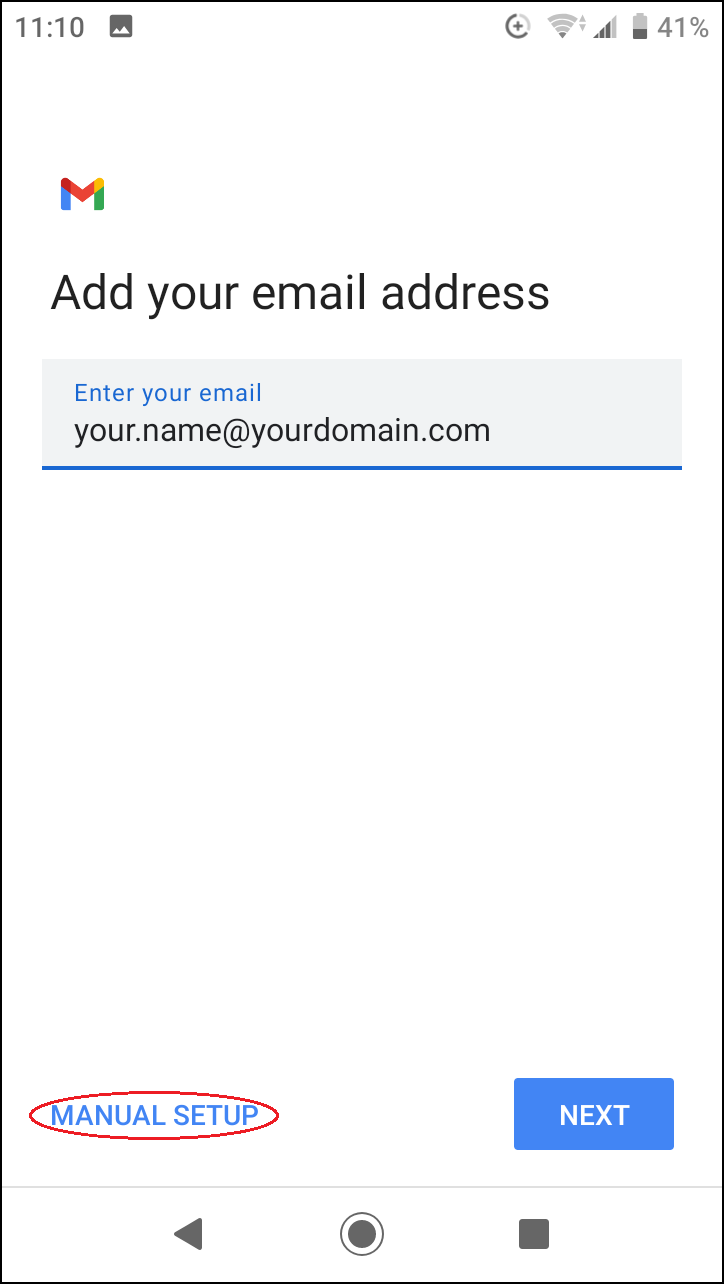
Then enter your e-mail address in the “Enter your email” field and click on the “MANUAL SETUP” link:
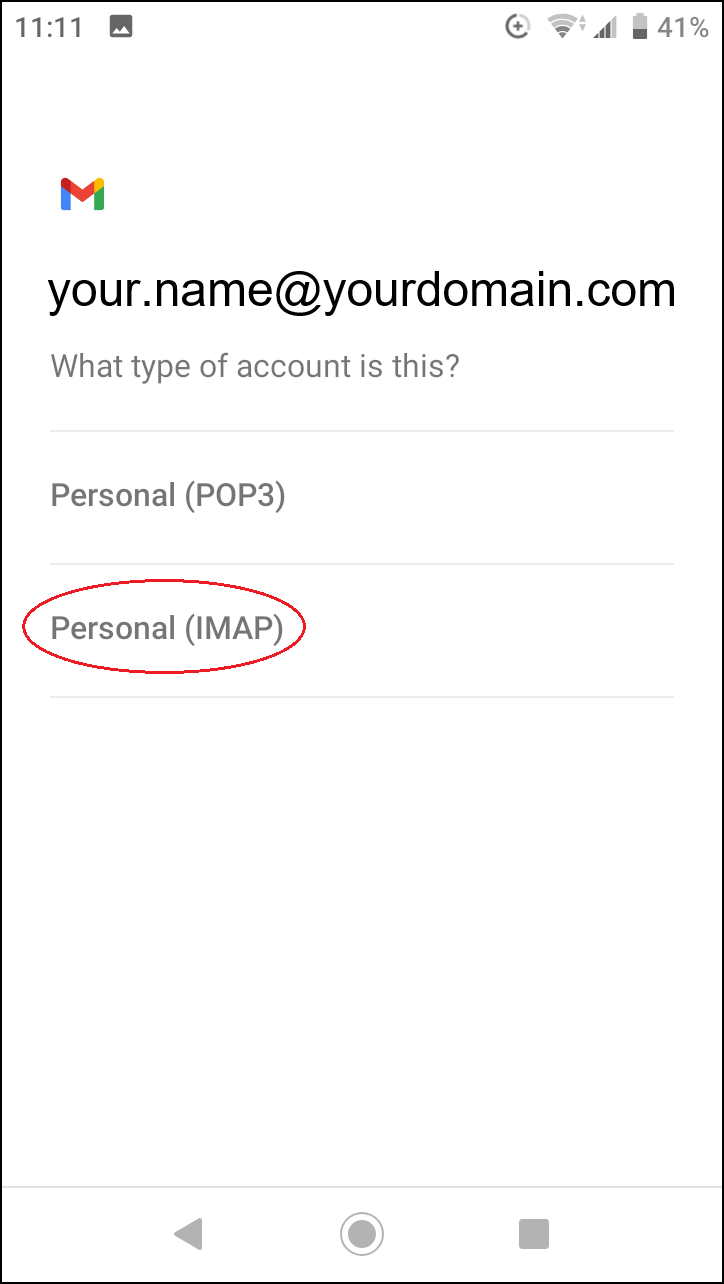
Select “Personal (IMAP)” again:
On the next page, enter the password for the e-mail account and press the “NEXT” button:

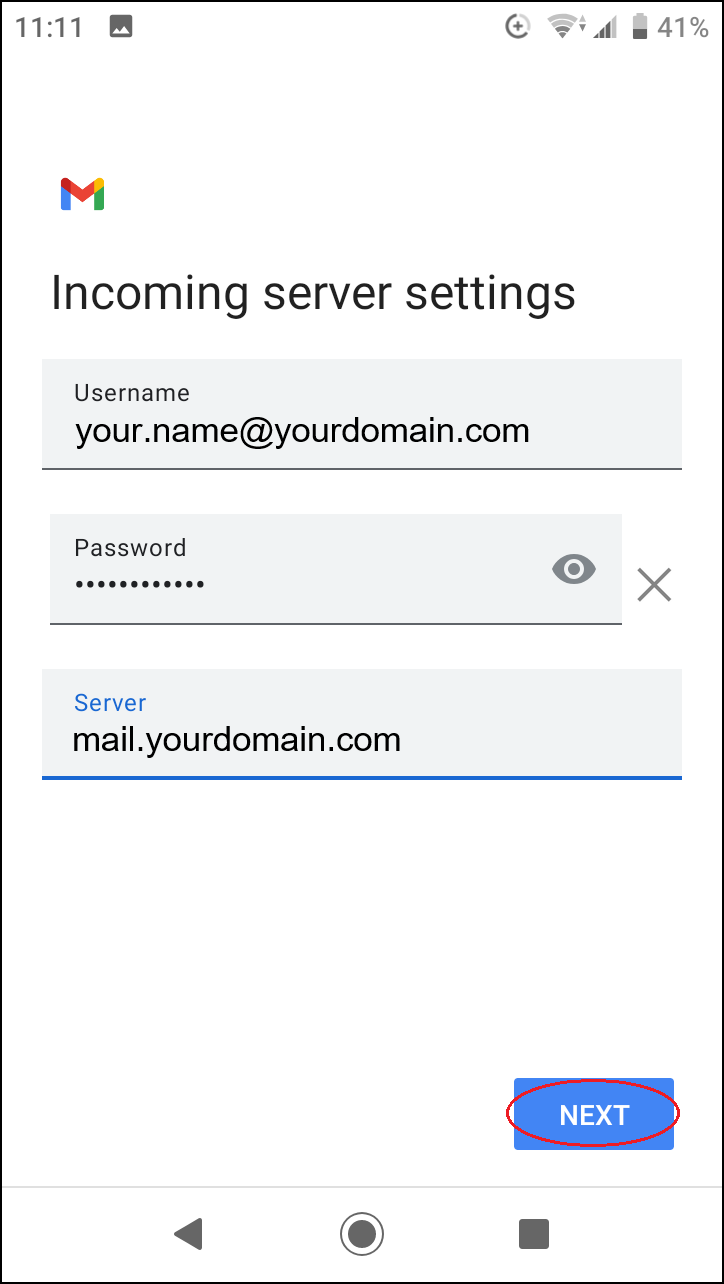
On the Incoming server settings page, fill in the following fields:
Username: enter your email address in this field
Password: enter the password for that email account in that box
Server: mail.yourdomain.com (“yourdomain.com” replace with your domain name)
When all fields will be filled, press the “NEXT” button:
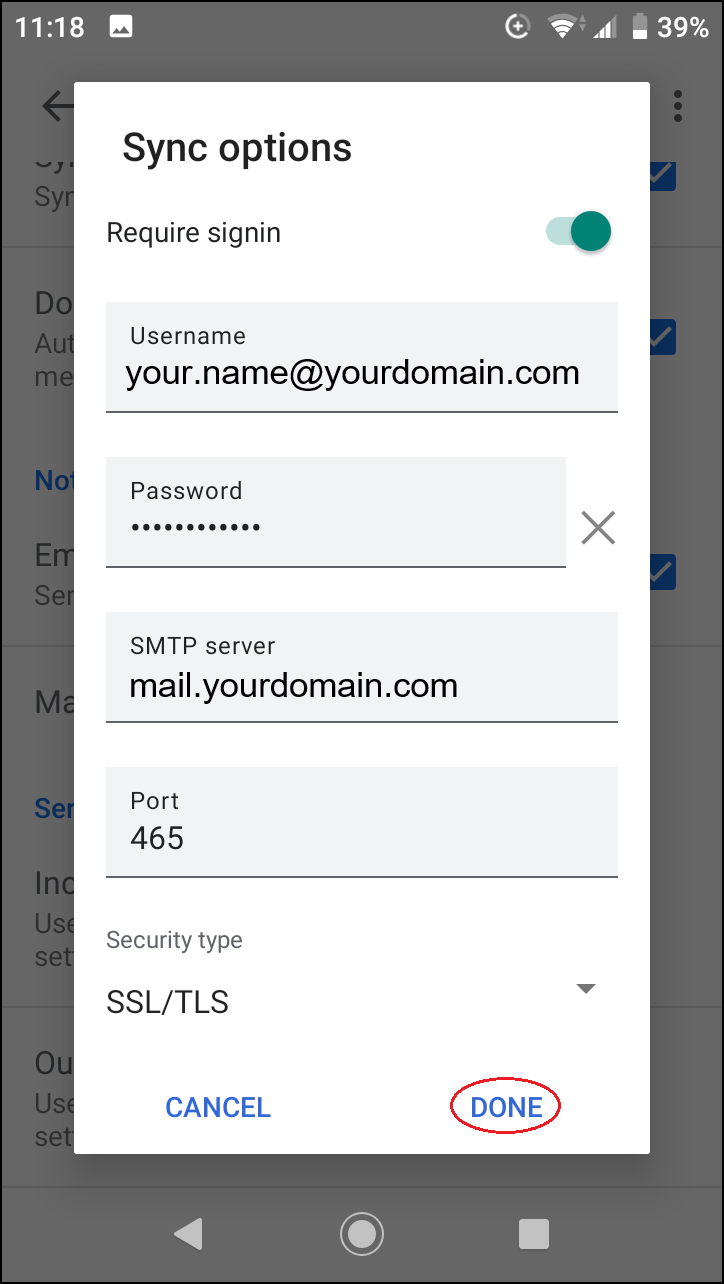
On the Outgoing server settings page, fill in the following fields:
Username: enter your email address in this field
Password: enter the password for that email account in that box
SMTP server: mail.yourdomain.com (“yourdomain.com” replace with your domain name)
When all fields will be filled, press the “NEXT” button:

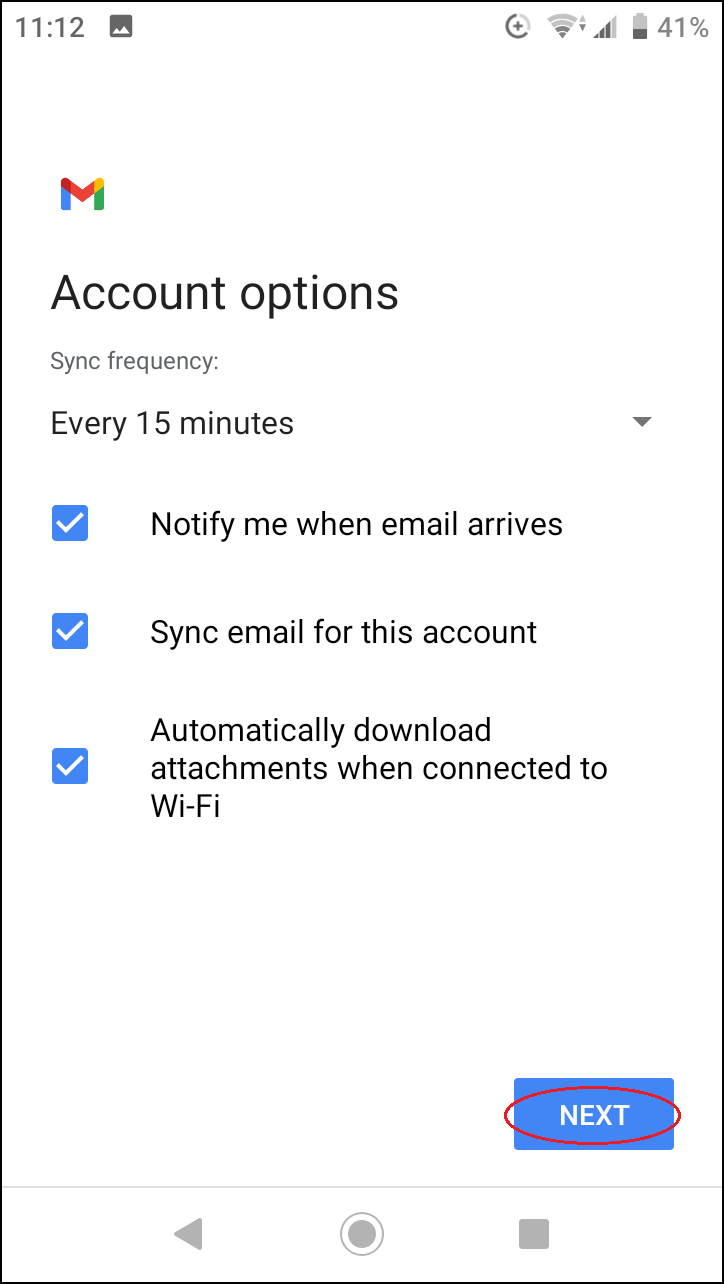
On the Account options page, click the “NEXT” button:
Next you can then type the name for the email account in the “Account name (optional)” box.
In the “Your name” field, enter your name or the name of your company.
When all fields will be filled, press the “NEXT” button:
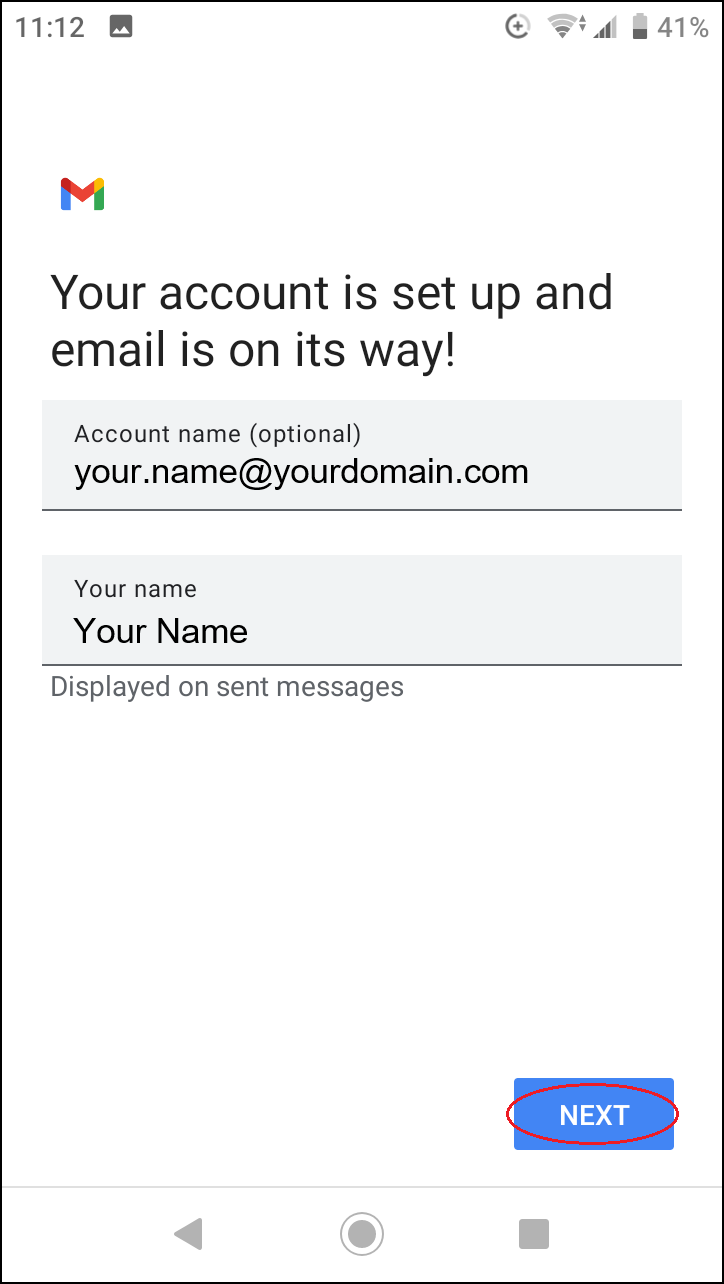
Email account has now been added.
You can generate email settings using the tool at the following link:
E-mail settings generator
If the e-mail account has already been added and you need to change the settings for that e-mail account, the instructions below will help you.
On your Android device, select “Settings > Accounts”:

Then, on the Accounts settings page, click on the email account which settings you wish to change:
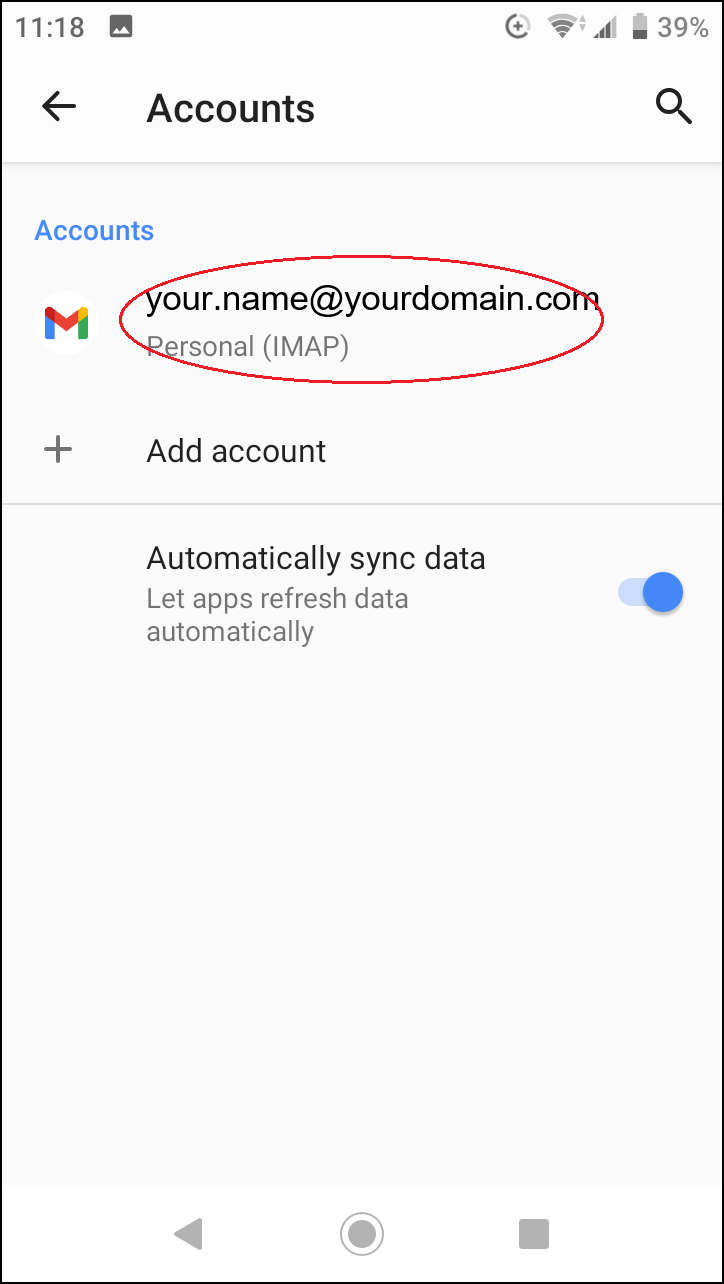
Next choose “Account settings”:
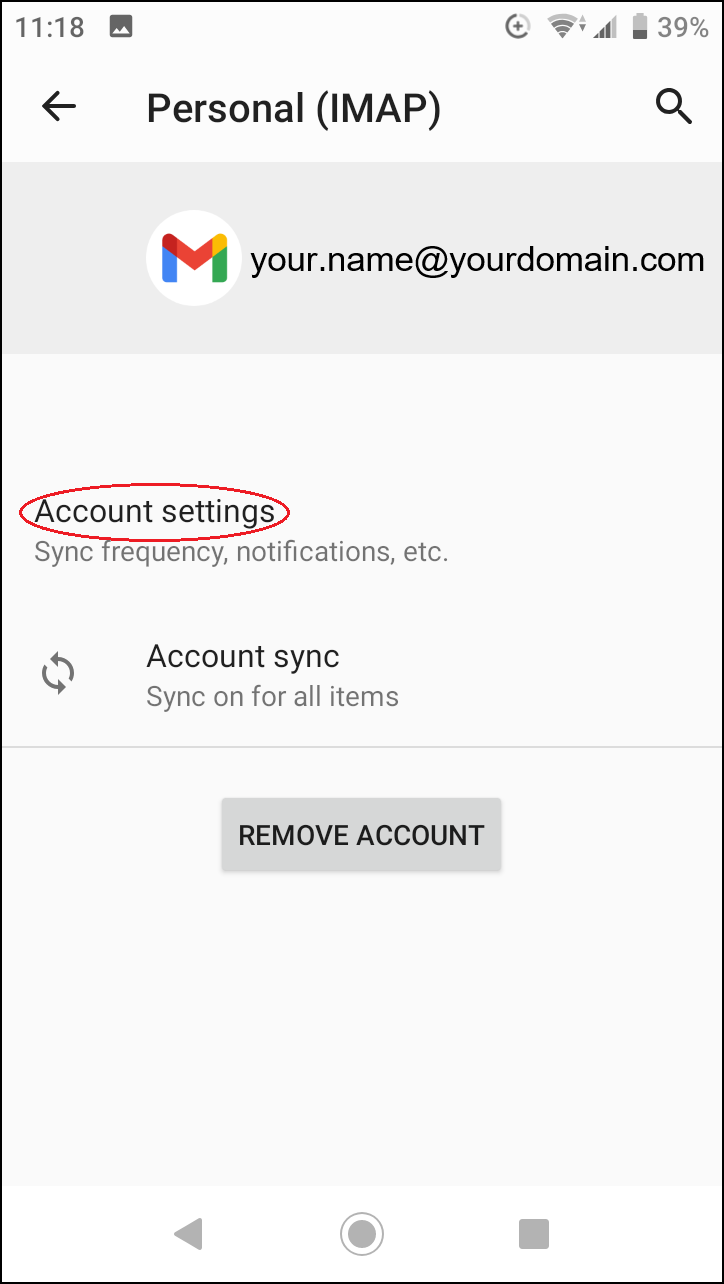
Once again, click on your email account which settings need to be changed:
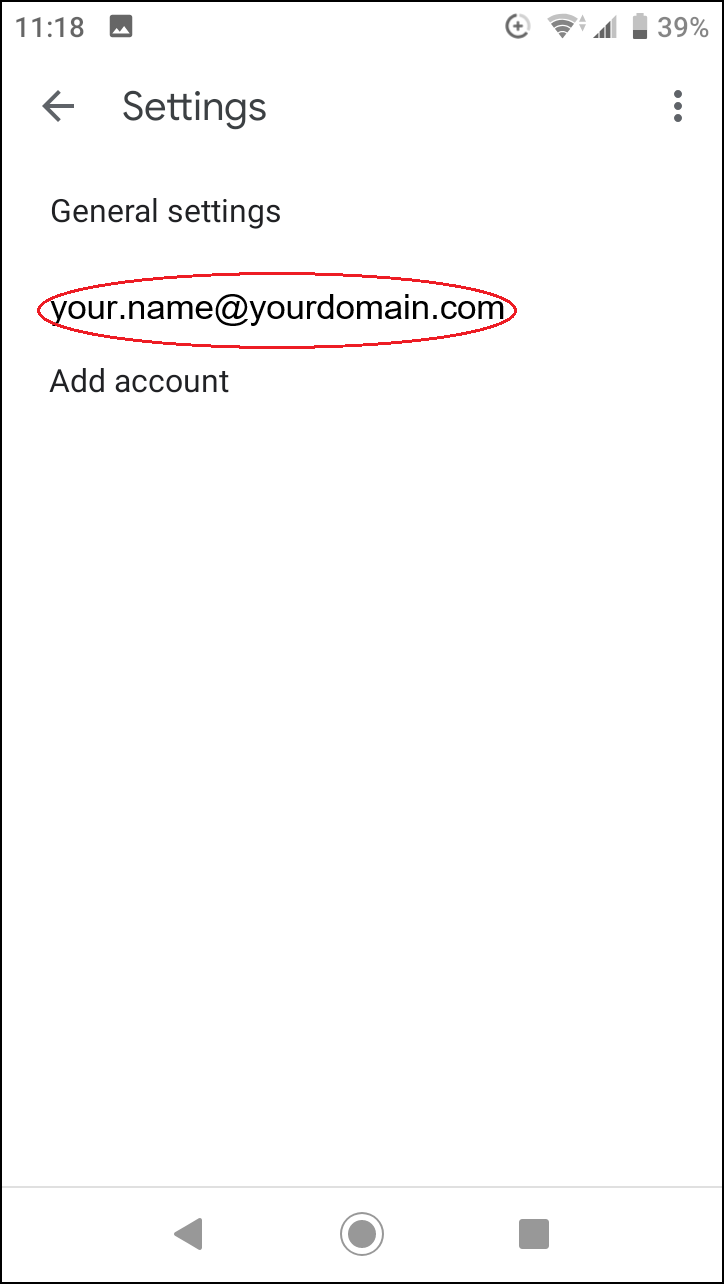
NB! If you can’t access your email account settings from the “Settings > Accounts” menu, then select “Settings” from the menu in the Gmail app, then click on your email account.
Under “Incoming settings” you can see the settings of the incoming mail server:
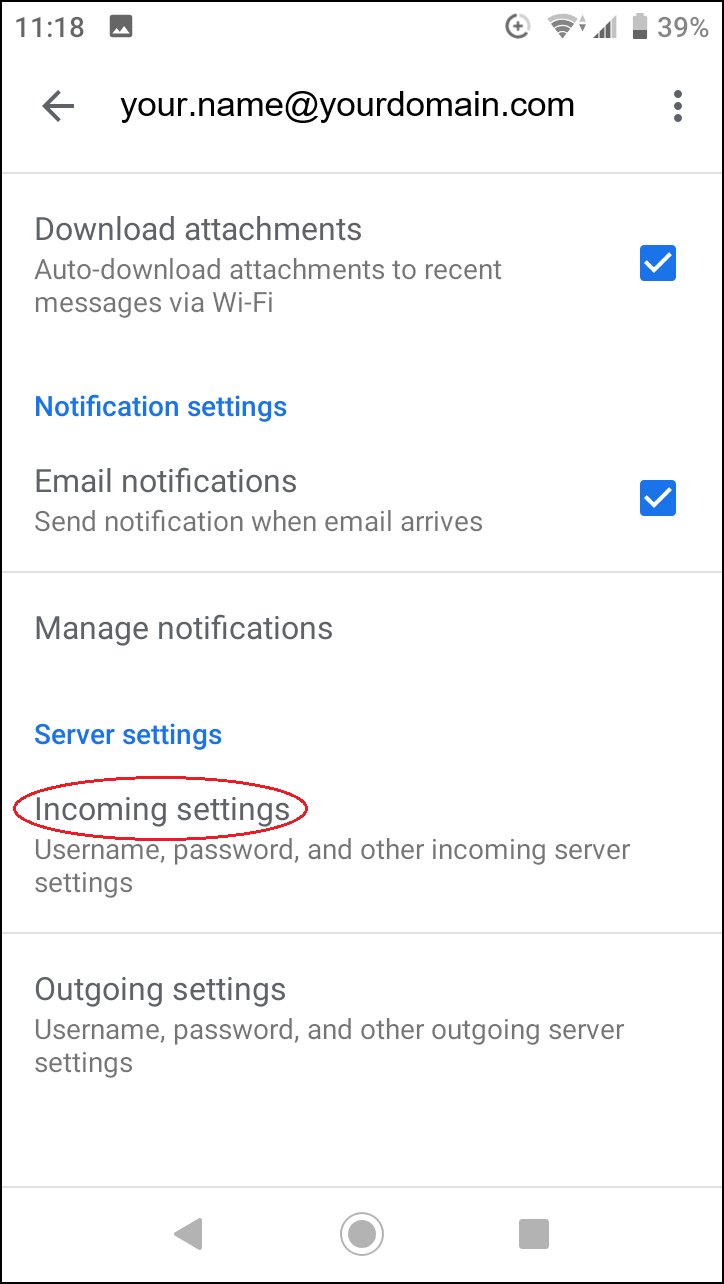
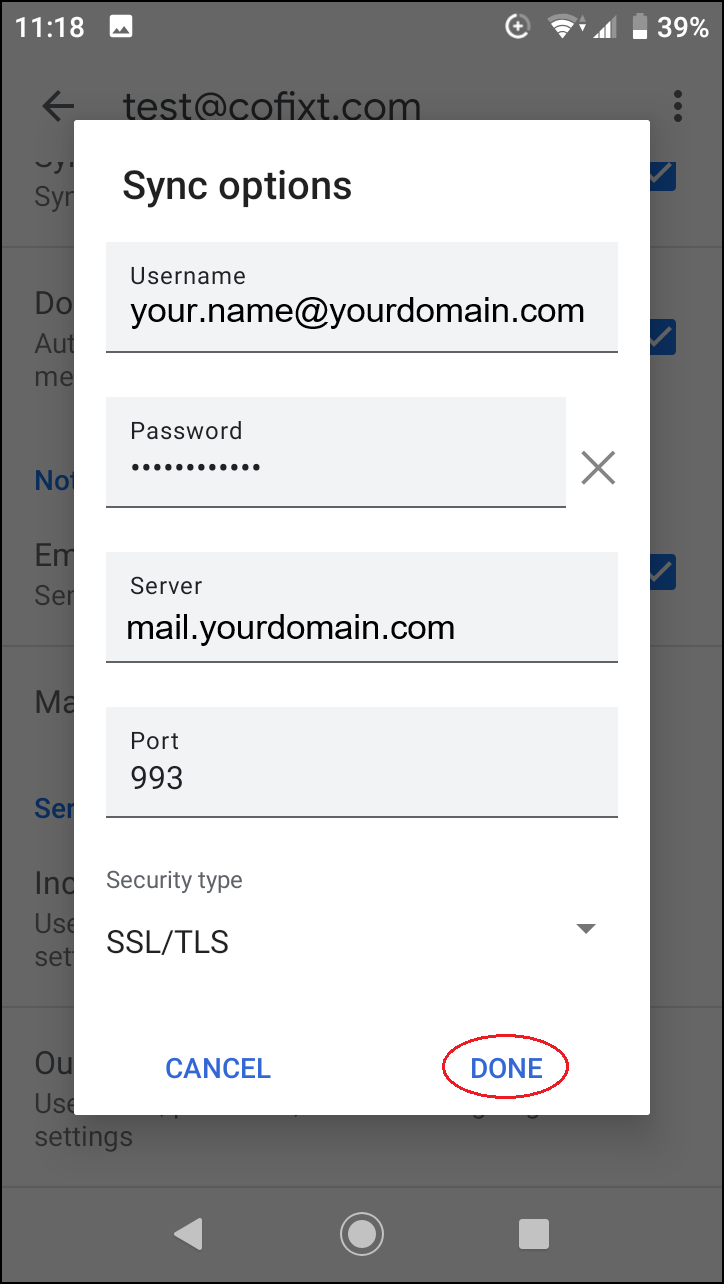
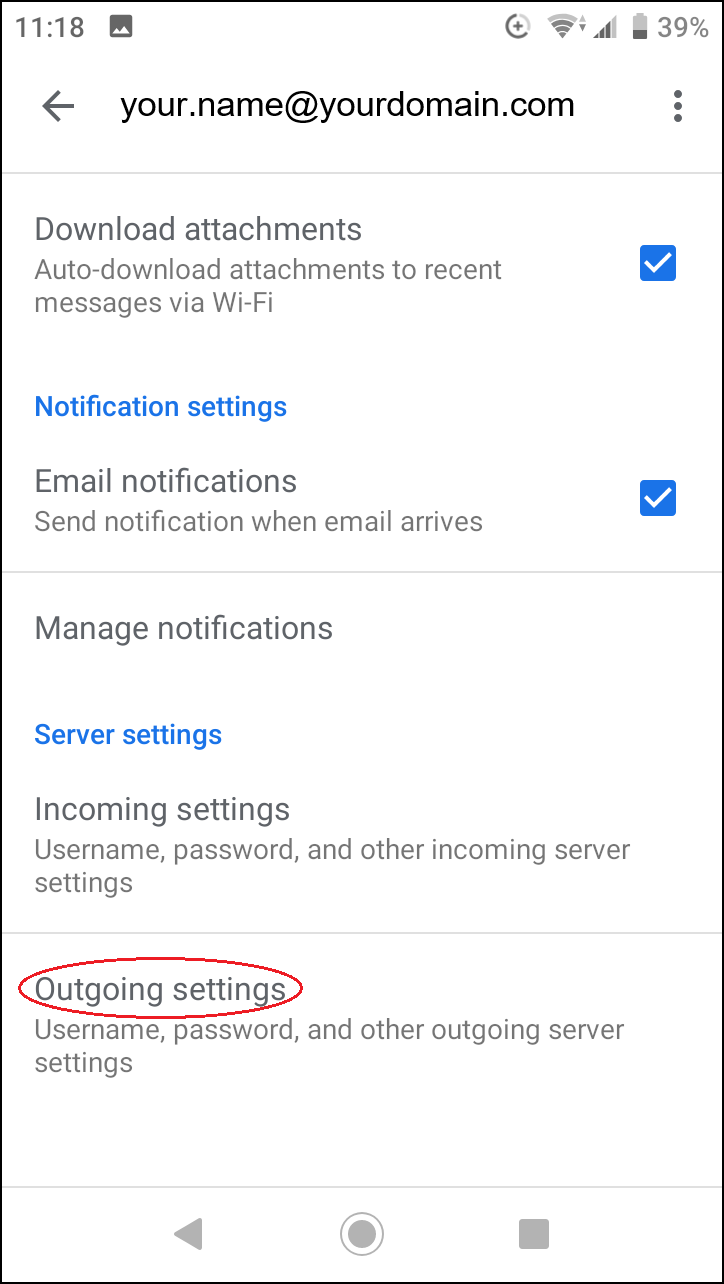
Under “Outgoing settings” you can see the settings of the outgoing mail server:
